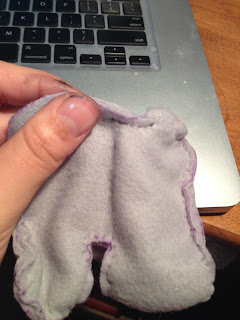
For material I decided to go to Dressew again and get a new fabric for her body and I found some very soft light grey polar fleece. It was so soft I just wanted a whole blanket of it hahaha
I am using the same pattern as the previous one from my last plushie from my last iteration:
https://www.etsy.com/ca/transaction/161523877?ref=fb2_tnx_title
The last one I did was a sort of a prototype with scrap material and with this plush I wanted to define it.
It is basically the same process as the last plushie but with some changes and additions. The first step is drawing out the pattern this time I used a marker instead of a pencil which made it a lot easier to see and it didn't fad.
Next is cutting out the pattern, the fleece was very nice to cut out since it was thick enough to bend and it was thin enough for the scissors to glide right through.
Time to start sewing! I used the same stitch as the last one, the running stitch which made it quick and easy. Also when sewing a plushie (or anything) you sew it inside out and than turn it out so the stitching and seam is hidden.
After sewing a bit of the head it was time to attach the ears which was little bit tricky one trying to figure out the placing and such. They were a bit uneven in sizing but it was easy to trim them to make it even.
After the head was completed it was time to start the body.
Instead of using the black buttons like last time I decided to make my own eyes out of white felt. I tried 2 different ways, painting and markers.
Even though the painted eyes had a more crisp and clearer appearance I decided to go with the marker eyes because they had a more softer look to them.
Attaching the head to the body I finish the most difficult part of the plush because you can't really see everything you are sewing together and it crucial to make sure everything lines up or else you may end up with lop sided plushie.
Once the head it attached to the body it was time to pull the plush inside out so the stitching is hidden. This makes patience and you have to work very carefully because the whole plush is being pulled inside out through the small tail opening.
Time for the cutie mark! The cutie mark are the little butt tattoo things My Little Pony character have it's suppose to represent their special talent....so Derpy's is bubbles? I painted these bubbles using white acrylic paint.
Next I made her little pegasus wings. I sewn two pieces of fabric together and did the stitching for her feathers but it didn't show up as much as I liked it to so I colored it in with a marker.
For the mane and tail I used the same yellow wool felt because it was the perfect color and I had lots of spare fabric left.
After attaching her eyes and wings she is complete!!!!!
The last plushie! I am very pleased with the result of the last one and I feel that I improved quite a bit from my first one. After these last few experiences I decided I would like to further pursue my plush making and try new and more advance patterns. I am kind of sad I didn't use the sewing or embroidery machine for these plushies but that is okay; I am just starting to explore the art of plush making and there will be lots of opportunities in the future to use those tools. For a future plush I would like to try using this pattern:
https://www.etsy.com/ca/transaction/158305392?ref=fb2_tnx_title
In the beginning this was the pattern that got me inspired to pursue the idea of plush making but once I looked at it I got overwhelmed but now after some practice I feel the idea of tackling such an advance pattern won't be so scary.
I am very happy with these little ponies and happily add them to my ever growing collection of My Little Pony merchandise. It's a great feeling knowing that I have something I made myself to add to my collection :)
Thank you all for viewing my page and watching my journey as a plush maker and I hope you all had a great time with this experience as I have and maybe in the future I'll blog about my future attempts at the other plushies I make :D
Peace out Everypony see you in class tonight and I am totally stoked for seeing all the other projects!!!


