Monday, 25 November 2013

Final plushie!!!

Well this is it the final iteration! I was very excited on making this plush because I wanted to do all the details of the character I was making, Derpy hooves. For those who don't remember who she is here is a picture of her:

Photo from: http://fc05.deviantart.net/fs71/f/2012/260/e/b/derpy_hooves_vector_by_durpy-d4bwgwf.png

For material I decided to go to Dressew again and get a new fabric for her body and I found some very soft light grey polar fleece. It was so soft I just wanted a whole blanket of it hahaha

I am using the same pattern as the previous one from my last plushie from my last iteration:
https://www.etsy.com/ca/transaction/161523877?ref=fb2_tnx_title

The last one I did was a sort of a prototype with scrap material and with this plush I wanted to define it.


It is basically the same process as the last plushie but with some changes and additions. The first step is drawing out the pattern this time I used a marker instead of a pencil which made it a lot easier to see and it didn't fad.


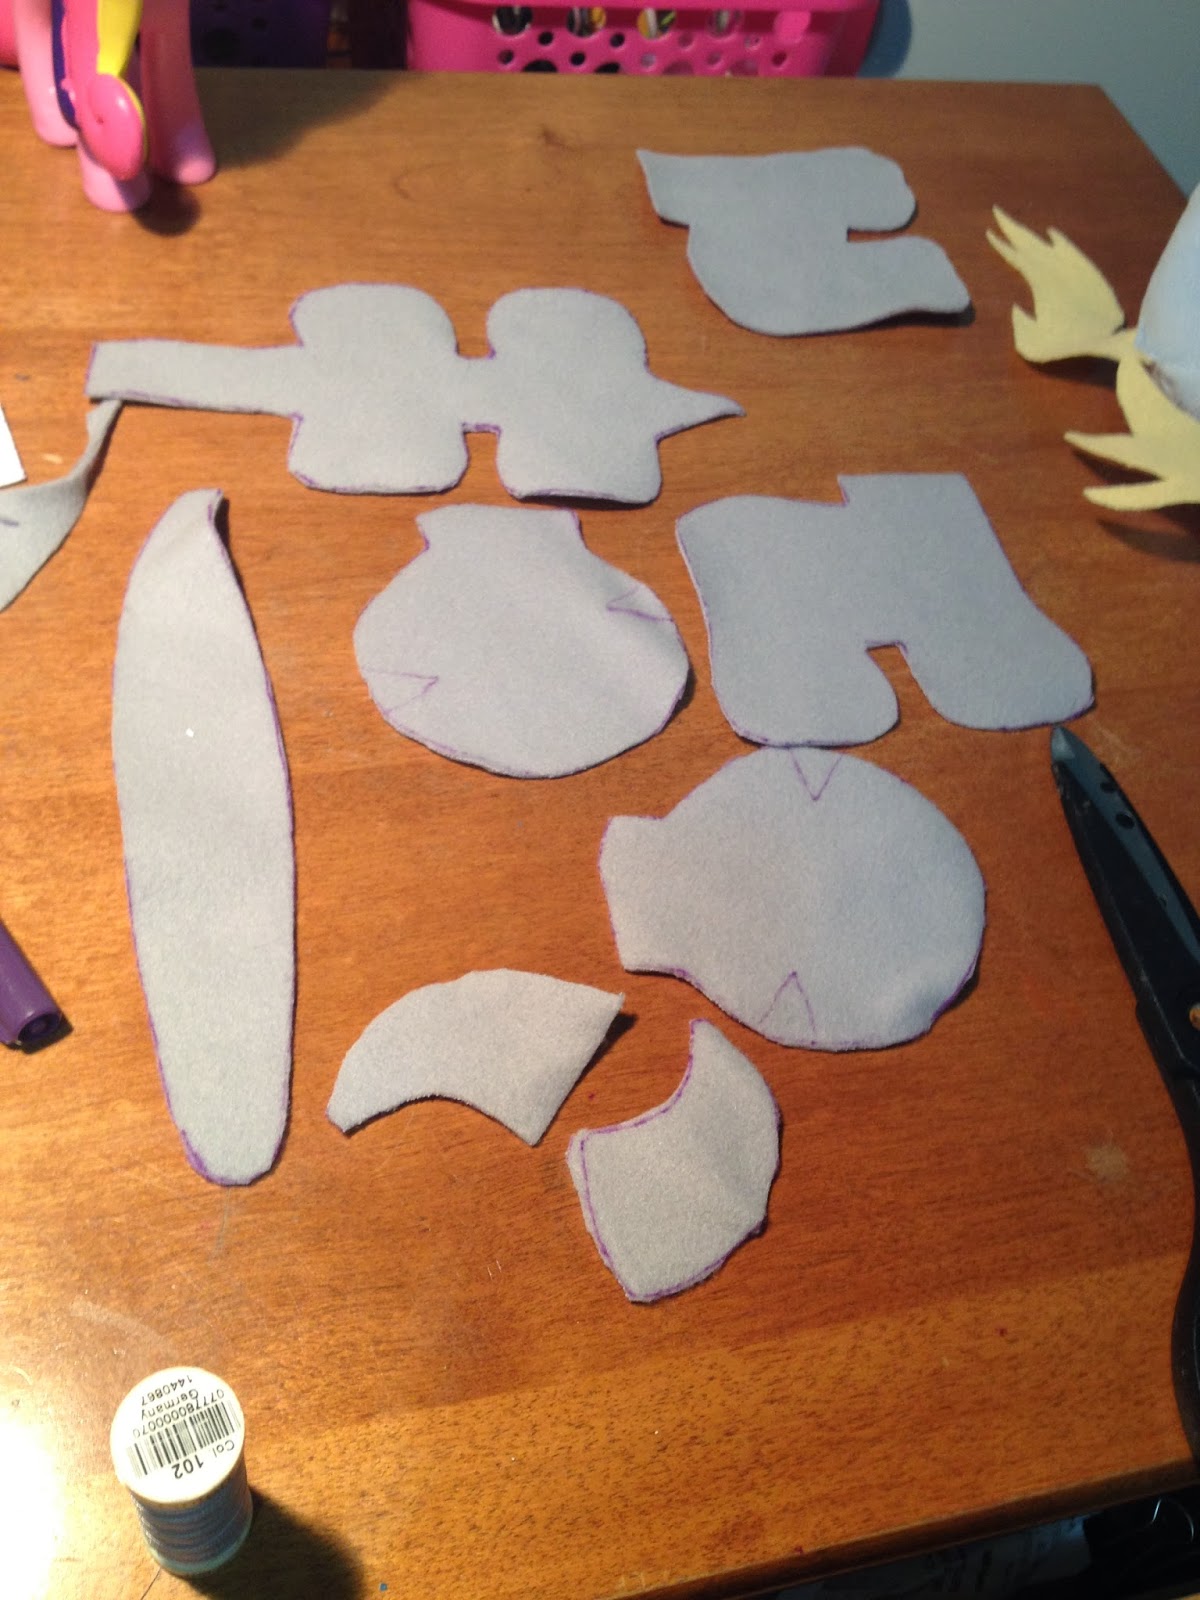
Next is cutting out the pattern, the fleece was very nice to cut out since it was thick enough to bend and it was thin enough for the scissors to glide right through.


Time to start sewing! I used the same stitch as the last one, the running stitch which made it quick and easy.  Also when sewing a plushie (or anything) you sew it inside out and than turn it out so the stitching and seam is hidden.


After sewing a bit of the head it was time to attach the ears which was little bit tricky one trying to figure out the placing and such. They were a bit uneven in sizing but it was easy to trim them to make it even.


After the head was completed it was time to start the body. 


Instead of using the black buttons like last time I decided to make my own eyes out of white felt. I tried 2 different ways, painting and markers. 


Even though the painted eyes had a more crisp and clearer appearance I decided to go with the marker eyes because they had a more softer look to them.


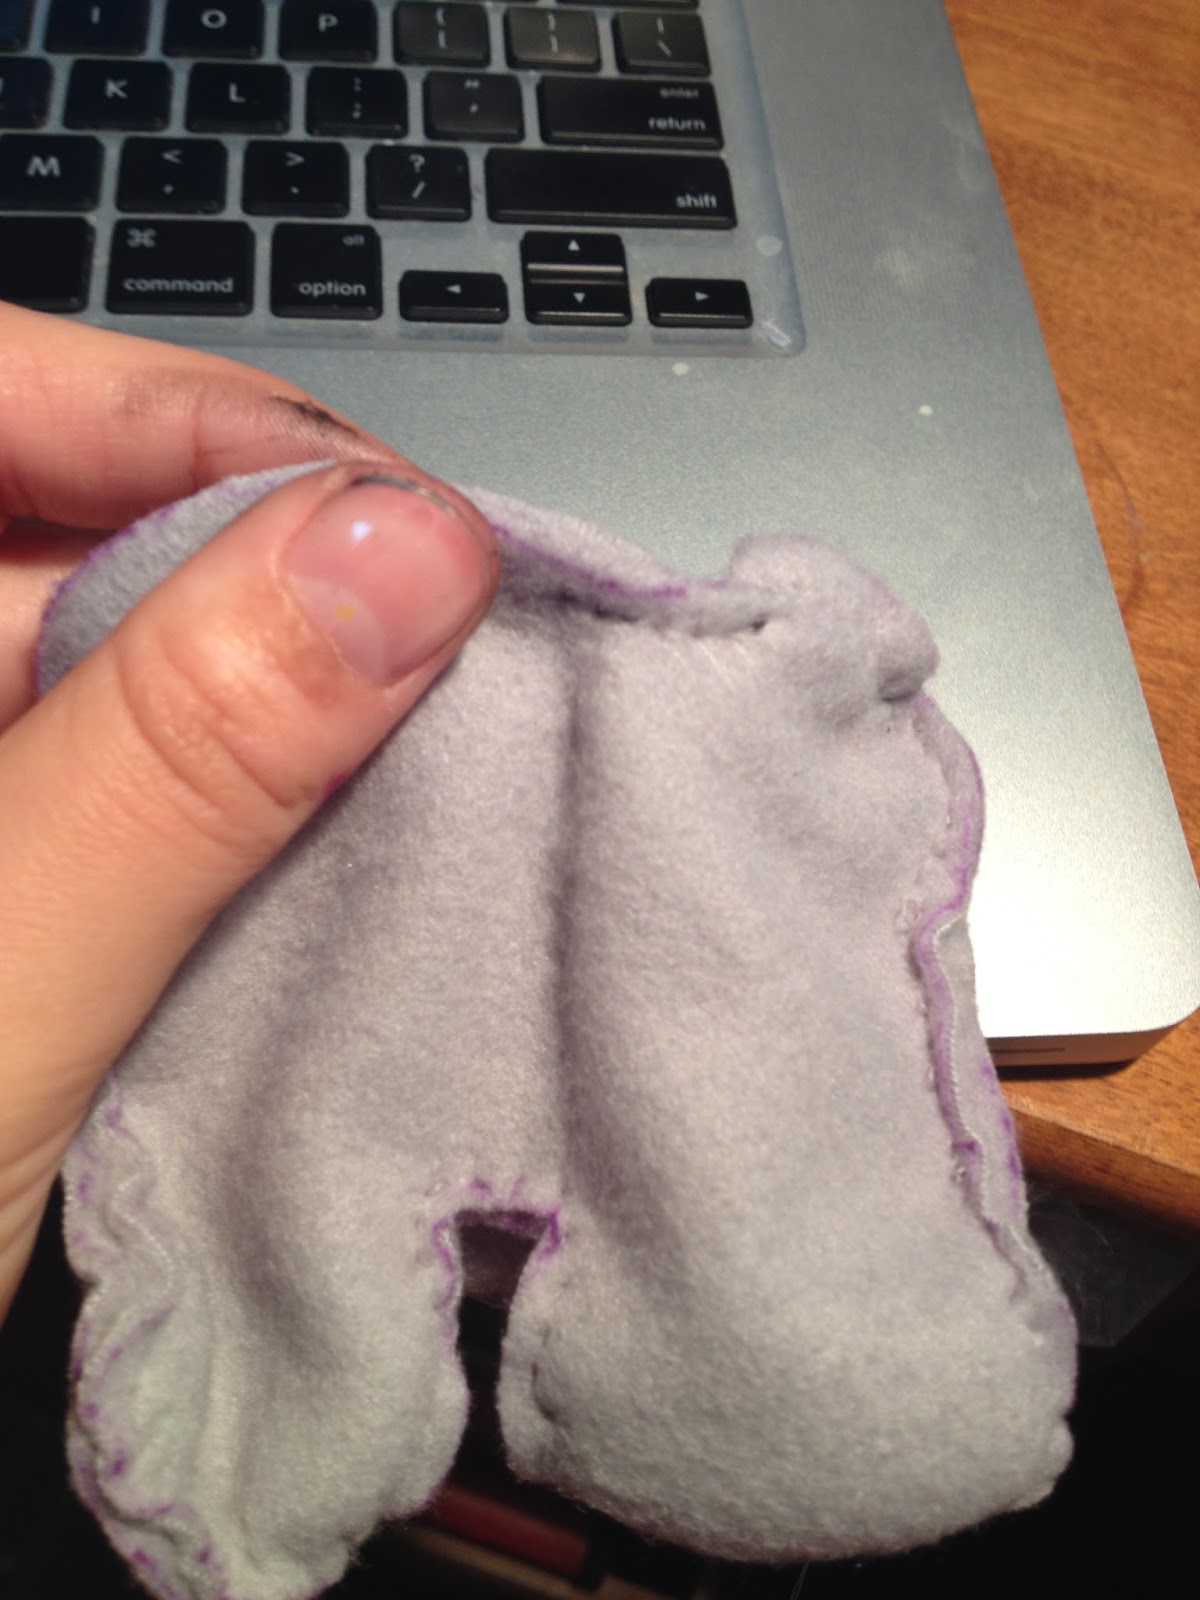
Attaching the head to the body I finish the most difficult part of the plush because you can't really see everything you are sewing together and it crucial to make sure everything lines up or else you may end up with lop sided plushie.


Once the head it attached to the body it was time to pull the plush inside out so the stitching is hidden. This makes patience and you have to work very carefully because the whole plush is being pulled inside out through the small tail opening.


Time for the cutie mark! The cutie mark are the little butt tattoo things My Little Pony character have it's suppose to represent their special talent....so Derpy's is bubbles? I painted these bubbles using white acrylic paint.


Next I made her little pegasus wings. I sewn two pieces of fabric together and did the stitching for her feathers but it didn't show up as much as I liked it to so I colored it in with a marker.


For the mane and tail I used the same yellow wool felt because it was the perfect color and I had lots of spare fabric left.


After attaching her eyes and wings she is complete!!!!!


The last plushie! I am very pleased with the result of the last one and I feel that I improved quite a bit from my first one. After these last few experiences I decided I would like to further pursue my plush making and try new and more advance patterns. I am kind of sad I didn't use the sewing or embroidery machine for these plushies but that is okay; I am just starting to explore the art of plush making and there will be lots of opportunities in the future to use those tools. For a future plush I would like to try using this pattern:

https://www.etsy.com/ca/transaction/158305392?ref=fb2_tnx_title

In the beginning this was the pattern that got me inspired to pursue the idea of plush making but once I looked at it I got overwhelmed but now after some practice I feel the idea of tackling such an advance pattern won't be so scary.

I am very happy with these little ponies and happily add them to my ever growing collection of My Little Pony merchandise. It's a great feeling knowing that I have something I made myself to add to my collection :)


Thank you all for viewing my page and watching my journey as a plush maker and I hope you all had a great time with this experience as I have and maybe in the future I'll blog about my future attempts at the other plushies I make :D

Peace out Everypony see you in class tonight and I am totally stoked for seeing all the other projects!!!


Sunday, 24 November 2013

2nd plushie process

Hello everyone!


So sorry this post is terribly late! I was having difficulties with the photos and been busy with final projects from other classes all week. It's that time of the semester!

This plushie has a more advance pattern than my last one. I got the pattern from Etsy here: https://www.etsy.com/ca/transaction/161523877?ref=fb2_tnx_title

 For material I wanted to work with some thing different so I went to Value Village to see what I can find. I looked through many different fabric options and finally came across some old polyester pajamas that were inexpensive and a nice soft blue material.

when I got home I printed out the pattern and cut up the pajamas and got all my material prepared for my second plushie!


Next is the cut out the pattern shapes and pin it onto the fabric and cut it again


After cutting out all the pieces it was time to sew them together. Instead of using the back stitch like with the last plushie I decided to used a running stitch.


      next I had to attach the ears which was quite tricky and a bit difficult to do and also I had more pieces to sew together which was challenging.


                                        After I finished sewing the head the next was the body.


Sewing the body reminded me of the loaf plush pattern with the short legs, but it was way more difficult to sew. The shape was also more different and required to be sewn in different angles.


Here is the body! It was sewn inside out like last time so the stitching is hidden when turned inside out. Next is time to attach the head piece to the body!


Here is a frightening image! I had to push the head into the body and sew it at the middle of the neck and then pull the whole thing inside out which requires patience and delicate handling.


There we go all the turning inside out paid off! With trying the running stitch the thread of the stitching is very well hidden which is a big improvement from the last plush :)
I also added the black eye buttons to this plush as well, now time for stuffing!

 She got a lot of stuffing, I think I may have put to much in the head XD
After all the stuffing it is time to add the mane and tail. I used the same felt was the last plush.


And now she is finished!!!!!


                      I really enjoyed making this plush and learned so new techniques for my future plushies and I feel I have also grown a bit as a seamstress as well but it's only the begging! I am half way finished my third project and will be posting the photos shortly so stay tuned!

Hope everyone enjoys the rest of your weekend :)


Tuesday, 12 November 2013

Loaf Pony Plush Complete

Hello again!

Over the weekend I was able to finish my own pony load plush :D


I started off cutting out the paper pattern and pinning it onto the fabric. After stabbing myself a few times with the pins I started tracing the shapes with a pencil and  cutting out them them out.


All the pieces are all cut out and ready for sewing! But first I need to make the plush's face before sewing it together.


I decided to use acrylic paint for the mouth and to edit the eye inserts because I wanted them solid black.


Now it's time to start sewing! I decided to hand stitch her since I don't have more access to a sewing machine and I also feel a plush is a little more special when it has that hand sewn labor in it :)


When sewing a plush its important is sew inside out so the stitches are hidden. For this plush I used a a basic whip stitch.


Haha finished most of the sewing and she looks creepy inside out! It is a very basic pattern so it basically sewing a box shape with a few small details.

Now its time to pull her inside out again so the good outside is showing.


Here she is! Haha she looks very limp. Now she needs her mane, tail, and wings!

 
Now after sewing on her final details on it's time to give her one of the most important factors of the plush, stuffing! I am going to be stuffing her with a lot of fluff to make her extra squishy and cuddly.

Last is to sew up the opening where her stuffing went and after all that work she is completed!!!!!!!!


Now I have my very own My Little Pony Derpy Hooves plushie :D I am thrilled with how she turned out and how cute she is! I showed my sister and friend and they loved her too, more than I originally thought they would!  I feel like I have learned a lot of the basics of sewing and notices a few areas I can improve on. I need to make my stitching smaller and more even so it's less visible. I hoping to make other My Little Pony characters in the future and maybe give some to my friends for Christmas. And also I am very happy to have a plushie I made myself to add to my collection! Next I am going to to a prototype of a more advanced pony plush!

Bring on the plushies!!!


              And here is me and my other lovely My Little Pony plushies with the newest addition, Derpy Hooves!

Amazing loaf pony plush from http://www.deviantart.com/#/art/Pony-Loaf-pattern-317628087?hf=1


Monday, 11 November 2013

Hunt for Materials

Hello everyone

Sorry for the late post on materials I am kind of just bunching everything together sense everything is starting to get really busy.  For my choice to buy materials I decided to go to Dressew on Hastings. I have been there before for getting materials for a costume I was making and they had everything I needed!

I had many different choices for fabrics but I wanted to find something not to expensive for my first plush. I went through many aisles and looked at different options like fleece and felt. I Eventually found some wool felt squares on sale and they had i exact colors I needed! Wool felt is a lot more stronger overall better quality than regular felt and it is still soft.

Next I went downstairs to look for other things I needed like stuffing and thread. I found use baskets full of different shapes and sizes of polyester fiberfill for different projects like pillows, quilts, and assorted bags of the fluffs. I decided to go for the smallest bag and it was plenty.


After I looked for some thread and found some light grey polyester thread. And I found some plastic dome insert eyes. The rest of the supplies I needed like scissors, the pattern, and needles I already had at home.


Almost there! All is left is to print out the pony loaf pattern http://www.deviantart.com/#/art/Pony-Loaf-pattern-317628087?hf=1.


One Derpy Hooves pony loaf plush on its way!

Wednesday, 6 November 2013

History of plushies


Hello everypony (haha get it everyPONY  instead of everyBODY)

Sorry for the late blog post everything has beeen crazzzzzyyy  with classes, homework, and life!
For my research I was baffled on where to start, internet was out of the question so I decided to go to the school library. I tried looking for books under the textiles isle but only found info on sewing clothes and stuff. So I decided to ask the librarian for help and she suggested looking the the toy section DUH! Why didn't I think of that?! So I rushed to that part of the library and found 2 really neat books.

http://www.dollshousewallpaper.com/communities/1/004/011/980/931/images/4598150559.jpg
 image from : http://www.dollshousewallpaper.com/communities/1/004/011/980/931/images/4598150559.jpg

The Encylopedia of Toys by Constance Eileen King

and


http://images.vinylpulse.com/vp_pics/dotdotdash/cover/dotdotdash_cover_500.jpg
image from :  http://images.vinylpulse.com/vp_pics/dotdotdash/cover/dotdotdash_cover_500.jpg

Dot Dot Dash by Robert Klanten

Both books were filled with tons of info and pictures! The first book focused more on different types and history of toys and the other focused more on the culture meaning of toys.

Some of the first soft toys were rag dolls and were made centuries ago to my surprise!

http://www.britishmuseum.org/images/ps267712_m.jpg

image from http://www.britishmuseum.org/images/ps267712_m.jpg

Here is a creepy image of an old doll from 1st-5th century AD made in Egypt


Another thing I learned is the popular design Teddy bear is based from a sketch

http://upload.wikimedia.org/wikipedia/commons/b/b3/TheodoreRooseveltTeddyBear.jpg
image from: http://upload.wikimedia.org/wikipedia/commons/b/b3/TheodoreRooseveltTeddyBear.jpg

The sketch is by   Theodore "Teddy" Roosevelt  features a cute bear cub and that's now the Teddy bear got its name.

Its all very interesting! I remember in the 90's when robotic soft toys were all the craze! Haha does anyone rememeber having a Furby or a Tickle-Me-elmo.

Well that's all for now next is the material portion of the project!

- peace!